
Tools
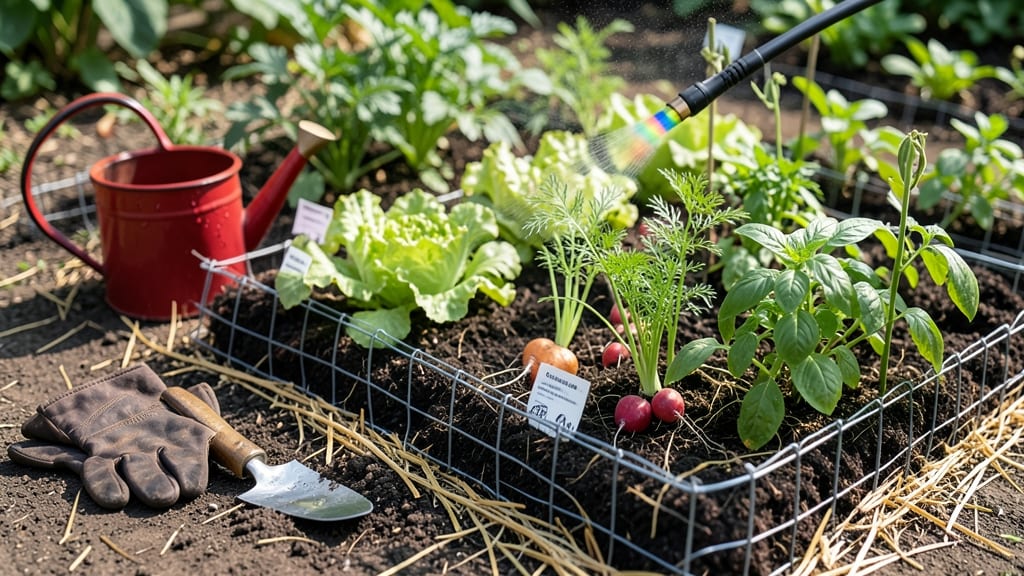
A chicken wire vegetable garden is one of the simplest, most effective ways to protect your 🥬 harvest from hungry pests without breaking the bank.
Struggling with pests ruining your vegetable garden? Chicken wire isn’t just for coops—it’s a gardener’s secret weapon for creating sturdy, flexible, and budget-friendly protective barriers that keep critters out without sacrificing plant growth.
Whether you’re dealing with rabbits nibbling your lettuce or squirrels digging up your carrots, this lightweight metal mesh can be bent, shaped, and installed in minutes to create fences, trellises, or even raised bed frames.
In this guide, I’ll walk you through the best ways to use chicken wire in your garden—from DIY fencing to creative hacks for small spaces—so you can enjoy a thriving harvest without the constant battle against pests.
How to build a chicken wire vegetable garden fence for maximum pest protection
If you’ve ever watched rabbits munch on your lettuce or deer casually stroll through your garden like it’s an all-you-can-eat buffet, you know how devastating pests can be.
A chicken wire vegetable garden fence is one of the most effective, budget-friendly solutions to keep critters out while letting your plants thrive. Unlike rigid fencing, chicken wire is flexible, easy to install, and can be customized to fit any garden shape or size.
The key to success lies in height, anchoring, and material quality. A fence that’s too short won’t deter determined pests like rabbits or groundhogs, while poor anchoring can leave gaps for sneaky intruders.
In this guide, I’ll walk you through the exact steps to build a fence that keeps your tomatoes, carrots, and herbs safe from hungry visitors—no matter how creative they get.
Step-by-Step Guide to Installing Your Chicken Wire Fence
-
1
Measure and Mark Your Garden Perimeter
Use a tape measure and stakes to outline your garden’s edges. For maximum pest protection, aim for a 3-foot minimum height—deer can jump over 2 feet, and rabbits will dig under shorter barriers. -
2
Choose Your Chicken Wire Mesh Size
Opt for 1-inch or 1.5-inch mesh—smaller gaps prevent even the most determined pests from squeezing through. Avoid larger mesh (like 2-inch), which rabbits can easily gnaw or push through. -
3
Build or Buy a Frame
DIY Option: Use 2x4 lumber to create a rectangular frame for each section (e.g., 4-foot lengths). Pre-Made Option: Purchase collapsible wire fencing kits for easier assembly. For tall fences, add horizontal supports every 2 feet to prevent bending. -
4
Attach the Chicken Wire to the Frame
Use staple guns or zip ties to secure the wire to the frame, starting at the bottom and working upward. Overlap sections by 6 inches to eliminate gaps. For extra durability, add a second layer of wire on the inside of the frame. -
5
Anchor the Fence Securely
Drive T-posts or metal stakes into the ground every 4 feet along the perimeter. For sloped gardens, bury the bottom 6-12 inches deep and bend it outward to deter digging pests like gophers. -
6
Add a Top Bend for Extra Defense
Bend the top 6 inches of wire outward at a 45-degree angle. This deters climbing pests like deer and rabbits, making it harder for them to scale the fence. For taller fences, add a second bend halfway up. -
7
Test for Gaps and Reinforce
Walk around the fence and check for holes, loose staples, or bent sections. Reinforce weak spots with additional staples or wire. For high-traffic areas, consider wrapping the base with hardware cloth to prevent digging.
One of the biggest mistakes I see gardeners make is underestimating the importance of burying the fence. Rabbits and groundhogs are master diggers—they’ll tunnel under a fence if given the chance.
To stop them, bury the bottom 12 inches deep and bend it outward at the base. This creates an underground barrier that even the most persistent pests can’t bypass.
For gardens with climbing vines like cucumbers or pole beans, consider leaving small gaps in the wire and training plants to grow alongside the fence. This not only saves space but also creates a natural windbreak.
Just be sure to secure the wire tightly to prevent vines from getting tangled and damaging the structure.
If you’re dealing with deer or larger animals, you’ll need to go taller—aim for 6 feet or higher. Deer can easily clear a 3-foot fence, but a well-anchored 6-foot barrier with an outward bend at the top will keep them out.
For extra security, add obstacles like thorny plants (e.g., roses or blackberries) along the fence line to discourage jumping.
Chicken wire is affordable and reusable, but it’s not indestructible. Plan to replace or repair sections every 2-3 years, especially if you have heavy pest pressure. Store unused wire in a dry place to prevent rusting
Chicken wire garden hacks: creative ways to use it beyond basic fencing
Chicken wire is one of those garden staples that’s often overlooked once you’ve built your basic fence. But this versatile material can transform your vegetable garden into a pest-proof, space-efficient powerhouse with just a little creativity.
I’ve found that repurposing chicken wire for trellises, raised beds, and plant collars saves me time, money, and headaches—especially when dealing with rabbits, squirrels, or curious neighborhood cats.
The best part? Most of these projects take less than an hour and use materials you likely already have lying around. Whether you’re working with climbing vines, shallow-rooted greens, or sprawling tomatoes, chicken wire can be the unsung hero of your garden layout.
Let me walk you through my top space-saving hacks that go beyond the typical fence.
One of my favorite space-saving solutions is using chicken wire as a temporary trellis for indeterminate tomatoes. Instead of buying expensive cages, I simply weave the wire into a cage-like structure around each plant.
This keeps the fruit off the ground, reduces disease risk, and gives me 30% more harvestable space in my small urban garden. Plus, I can remove it in the fall and reuse it the next year!
For shallow-rooted plants like lettuce or radishes, I’ve had great success with individual plant collars. These simple wire cylinders act as a physical barrier against slugs and snails without requiring chemicals.
I’ve even seen gardeners use them to protect newly transplanted seedlings from being nibbled by rabbits. The best part? They’re reusable and biodegradable—no waste!
If you’re dealing with weeds or soil erosion in your garden beds, don’t overlook the power of flat chicken wire. Laying it directly on the soil before adding mulch creates a natural weed barrier that lasts all season.
I’ve used this trick in my high-traffic garden paths to keep weeds at bay without resorting to herbicides. It’s a zero-maintenance solution that saves me hours of weeding every year.
Pro tip: If you’re worried about the wire looking too industrial, pair it with climbing plants like morning glories or sweet peas. They’ll quickly camouflage the wire while adding beauty and pollinator-friendly blooms to your garden.
My vertical garden grid is now a favorite spot for bees and butterflies—all thanks to a little chicken wire and some creative thinking!