
Picking
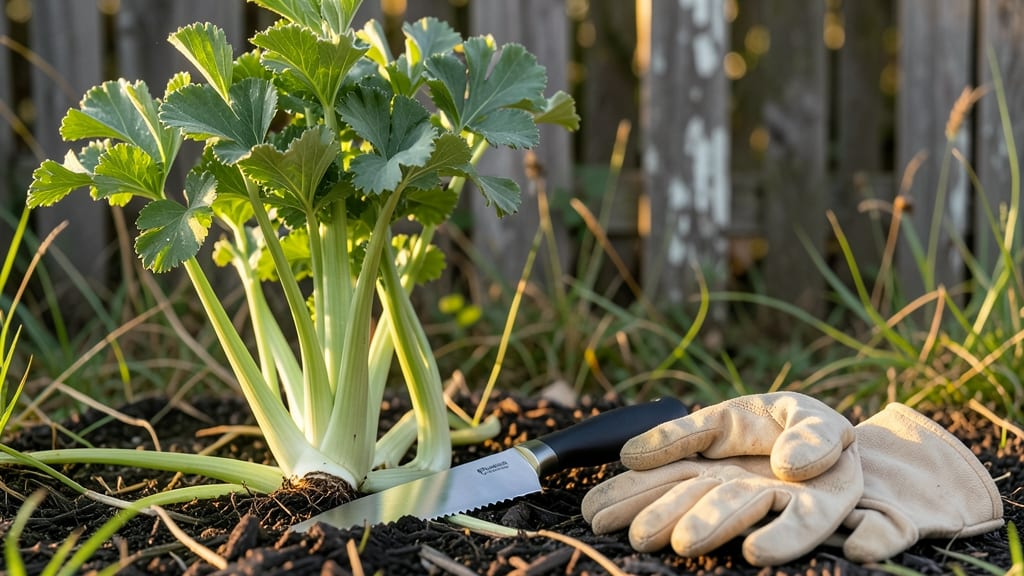
Harvesting garden celery at the right time turns your 🥬 crop into crisp, flavorful stalks instead of tough, bitter disappointment.
There’s nothing quite like the satisfying crunch of homegrown celery—if you harvest it at the perfect time. But knowing when to pull your garden celery for maximum flavor and tenderness can mean the difference between a crisp, flavorful feast and a woody, bitter disappointment.
Most gardeners wait too long, letting the stalks thicken past their prime. The key is watching for dark green leaves and stalks that snap cleanly when bent—not just height. Harvesting at the right stage also encourages regrowth, giving you a second crop from the same plant.
In this guide, I’ll walk you through the exact visual cues to look for, the best time of day to harvest, and how to store your celery so it stays fresh for weeks.
Whether you’re a first-time grower or a seasoned gardener, these tips will help you maximize your yield and flavor.

How to identify the perfect time for harvesting garden celery
Timing is everything when it comes to harvesting garden celery. If you harvest too early, the stalks will be thin and underdeveloped, lacking that satisfying crunch. But wait too long, and the texture turns woody, while the flavor becomes bitter and harsh.
The sweet spot? Between 60 to 100 days after transplanting, when your celery reaches its prime. This window ensures you get the crisp, tender stalks packed with flavor that make homegrown celery worth growing.
To nail the perfect harvest, focus on three key visual and tactile cues: stalk thickness, leaf color, and root development. These indicators work together to confirm your celery is ready to be pulled from the ground.
Ignoring even one can lead to a harvest that falls short of expectations—so pay close attention to how your plants look and feel before you grab those shears.
Start by examining the stalk thickness. Mature celery stalks should measure at least 1/2 inch in diameter—thicker is better! If you’re harvesting for regrowth, you can snip the outer stalks first when they reach this thickness, leaving the inner stalks to continue growing.
This method ensures you get multiple harvests from a single plant, maximizing your yield without sacrificing quality.
The leaf color is another critical clue. Healthy, ready-to-harvest celery boasts deep green leaves that look crisp and vibrant. If the leaves start turning pale or yellowing, it’s a sign of nutrient deficiency or overwatering.
Address these issues before harvesting, as they directly impact the flavor and texture of your celery. A quick soil test can help you pinpoint what’s missing.
Don’t overlook the roots—they tell a story too. When your celery is ready, the roots should be firm and white, not soft or rotting. Soft roots indicate overwatering or poor drainage, while rotting roots mean the plant is stressed.
If you notice these issues, adjust your watering schedule immediately and consider adding organic matter to improve soil structure.
One of the most reliable ways to test for readiness is the snap test. Gently bend a stalk near the base—if it snaps cleanly with a satisfying crack, it’s time to harvest.
If it bends without snapping or feels mushy, wait another week or two. This simple test saves you from harvesting celery that’s still too tender and ensures you get the perfect crunch.
Harvesting at the right time isn’t just about flavor and texture—it’s also about encouraging regrowth. If you leave your celery in the ground too long after it’s mature, the stalks will become woody and bitter, and the plant may bolt or flower, especially in hot weather.
Bolted celery is inedible, so stay vigilant and harvest before this happens.
Seasonal timing matters too. In cooler climates, aim for a spring harvest between June and July, while warmer regions can enjoy a fall harvest in October or November.
Pay attention to your local frost dates—celery is frost-sensitive, so avoid harvesting before the first frost or after the last frost if temperatures are extreme.
For continuous harvests, practice successive cutting. Snip the outer stalks first, leaving the inner ones to mature. This method extends your harvest season by several weeks and gives you a steady supply of fresh celery. Just be sure to keep the soil consistently moist and fertilized to support regrowth.
Once you’ve mastered these cues, you’ll never again wonder, "Is my celery ready?" Instead, you’ll confidently pull it from the ground at the peak of freshness, ready to enjoy in soups, salads, or as a crunchy snack. Happy harvesting! 🥬✂️
Step-by-step guide to harvesting celery for maximum freshness
Now that your garden celery is ready for harvest, timing and technique are everything. A clean, precise cut ensures maximum freshness and encourages future regrowth.
Grab your sharp harvesting tools—like a pruning shears or clean knife—and follow these steps to preserve that crisp, sweet flavor you’ve nurtured all season.
Start by selecting the outer stalks first—this leaves the inner stalks to mature for future harvests. Avoid cutting too close to the base, as this can damage the plant’s ability to regrow.
Always harvest on a dry morning when the stalks are firm and hydrated, ensuring the best texture and flavor.
Harvesting Celery: Step-by-Step
- Step 1: Choose mature outer stalks (12+ inches tall) with deep green leaves.
- Step 2: Use a sharp knife or pruning shears to cut 1 inch above the base at a 45-degree angle.
- Step 3: Gently twist or pull stalks if they resist the blade—avoid tearing leaves.
- Step 4: Rinse harvested stalks under cool water to remove dirt and debris.
- Step 5: Store in a plastic bag with a damp paper towel in the crisper drawer.
After harvesting, trim the leaves to about 2 inches above the base to redirect the plant’s energy toward regrowing new stalks. This cut-and-come-again method can extend your harvest by 4–6 weeks if done correctly.
Just remember: never remove more than one-third of the stalks at a time to avoid stressing the plant.
For long-term storage, consider blanching your celery before freezing. Trim the stalks, blanch for 2–3 minutes, then shock in ice water. Drain and freeze in airtight bags for up to 12 months.
This preserves the crisp texture and vibrant flavor, making it perfect for soups or stir-fries later in the year.
If you’re not ready to store or cook your harvest, place the stalks in a glass of water on your countertop. This mimics their natural growing conditions and keeps them crisp for up to 2 weeks. Just change the water every 2–3 days to prevent bacterial growth.
Pro tip: Avoid harvesting during peak heat (midday) or after heavy rain, as this can cause the stalks to wilt or develop a bitter taste. Timing your harvest right ensures your homegrown celery stays as fresh as the day you planted it! 🥬