
How To
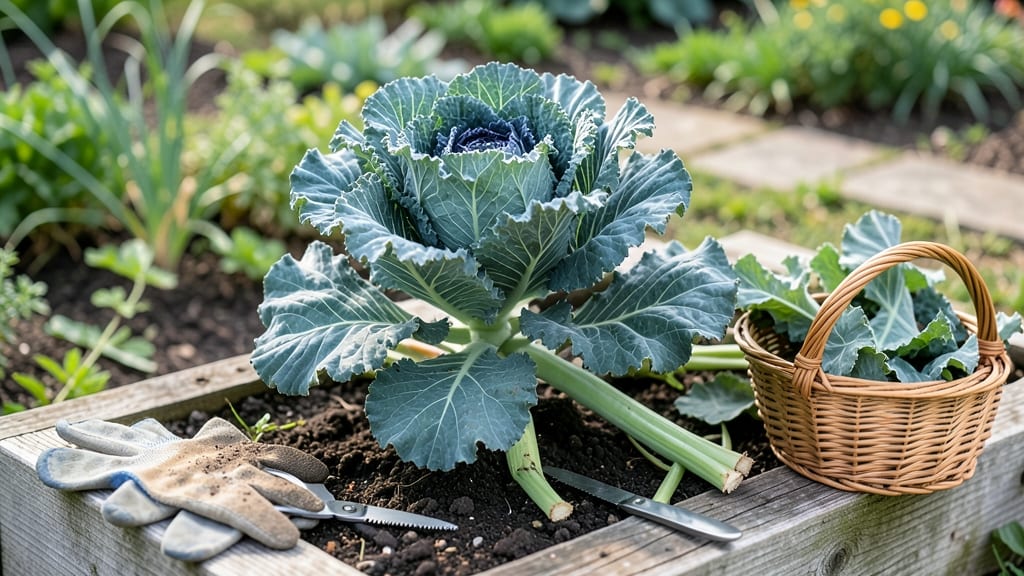
To pick kale from your garden the right way means harvesting leaf by leaf—never the whole head—to keep your 🥬 plants producing for months.
Harvesting kale the wrong way can leave you with a sad, stunted plant or bitter leaves that barely taste like the crisp, sweet greens you planted for. The key is timing, technique, and knowing exactly which leaves to cut—and which to leave behind.
You’ll learn when to harvest for the best flavor and regrowth, the tools that make the job easier, and the simple cutting method that keeps your kale thriving instead of struggling. No more guessing—just a foolproof guide to a steady supply of homegrown greens.
From avoiding common mistakes like overharvesting to mastering the perfect cut, this step-by-step approach ensures your kale keeps growing, even through fall and winter. Ready to turn your garden into a leafy green machine?

When and how to harvest kale leaves for continuous growth
Harvesting kale at the right time ensures you get the most flavorful leaves while keeping your plant healthy and productive. Unlike many vegetables, kale can continue producing leaves for months if harvested correctly.
The key is timing—wait until leaves reach 6-8 inches long and are deep green or vibrant purple. This usually happens 60-70 days after planting, but always check leaf firmness and color first.
Temperature also plays a role. Kale thrives in cooler weather, so aim to harvest in spring or fall when temperatures stay between 45°F and 75°F. Winter varieties can handle frost, but avoid harvesting during hard freezes.
If you live in a warm climate, harvest during cooler mornings to prevent stress on the plant.
Never harvest kale leaves that are still small or tender—they won’t have developed their full flavor or nutrients. Look for leaves that are fully mature but not woody. If you pick leaves too early, you’ll end up with bitter, underdeveloped greens.
Pro tip: The outer leaves are always the first to mature, so start there to encourage new growth from the center.
When harvesting, always prioritize the outer leaves first. These are fully mature and won’t harm the plant’s ability to produce new growth. Use clean, sharp pruning shears or a knife to cut leaves at a 45-degree angle, leaving about 1-2 inches of stem attached.
This angle helps water run off and prevents rot. Avoid cutting into the center stem—this is where new leaves emerge, and damaging it can kill the plant.
Leave at least half the plant intact after each harvest to ensure continuous production. If you remove too many leaves at once, the plant may struggle to recover. Kale is resilient, but it still needs energy to regrow.
After harvesting, water the plant deeply to help it bounce back. Mulch around the base to retain moisture and protect roots from temperature fluctuations.
Seasonal timing matters too. In spring, harvest as soon as leaves mature to avoid bolting. In fall and winter, kale often tastes sweeter after a light frost, so wait until temperatures drop slightly before picking.
Just be careful not to harvest during hard freezes—wait until the ground thaws and the plant recovers.
If your kale starts to bolt (sending up flower stalks), it’s a sign the plant is stressed or nearing the end of its life cycle. At this point, harvest any remaining leaves immediately and compost the plant.
Bolting makes leaves bitter and tough, so don’t wait too long. To delay bolting, provide consistent water and avoid over-fertilizing with nitrogen—this encourages leafy growth over flowering.
One common mistake is harvesting kale leaves in a way that damages the plant’s center. Always cut from the outer edge inward, never the middle. Another mistake is harvesting during peak heat—this stresses the plant and can lead to bolting.
Stick to cool mornings for the best results. With the right approach, a single kale plant can produce leaves for 6-8 months, making it one of the most rewarding vegetables to grow.
Step-by-step leaf-by-leaf harvesting technique for kale
Harvesting kale the right way ensures your plant keeps producing tender, flavorful leaves for months. The key is selective harvesting—removing only the outer leaves while leaving the inner growth intact.
This method encourages continuous regrowth and prevents bitter, tough leaves. Whether you're growing curly kale or lacinto, the same principles apply to maximize your harvest.
Before you begin, gather your harvesting tools: a sharp pruning shears or clean kitchen scissors (avoid dull blades that tear leaves), and gardening gloves if your plants have thorns. Work on a dry, sunny morning when leaves are crisp and hydrated.
This timing reduces stress on the plant and ensures the best flavor. Always sanitize your tools with rubbing alcohol to prevent spreading disease between cuts.
How to Pick Kale From Garden: Leaf-by-Leaf Guide
- 1 Identify mature outer leaves: Look for leaves that are 6-8 inches long, deep green or purple, and fully developed (avoid small or yellowing leaves). These are ready for harvest.
- 2 Position your tool correctly: Hold the pruning shears at a 45-degree angle about 1 inch above the leaf stem. This angle promotes faster healing and prevents water from pooling on the cut.
- 3 Make a clean cut: Snip the leaf just above the stem where it meets the plant. Avoid cutting into the central growing point—this is where new leaves form. A clean cut prevents damage and encourages regrowth.
- 4 Harvest selectively: Remove no more than 1/3 of the plant at a time. This rule prevents stress and allows the kale to recover. Focus on the largest, outermost leaves first—they’re less likely to regrow if left alone.
- 5 Inspect for pests/disease: While harvesting, check the undersides of leaves for aphids, slugs, or signs of rot. Remove any damaged leaves immediately and treat the plant if needed (e.g., neem oil spray for pests).
- 6 Post-harvest care: After harvesting, water the base of the plant to replenish moisture. Add a light layer of mulch (like straw) to retain soil moisture and suppress weeds. Fertilize with a balanced 10-10-10 formula if leaves appear pale or stunted.
After harvesting, store your kale properly to maintain freshness. Wrap leaves in a damp paper towel and place them in a sealed plastic bag in the fridge. This method keeps kale crisp for up to 5 days.
For long-term storage, blanch and freeze leaves—this preserves nutrients and flavor for up to 12 months. Always label your freezer bags with the harvest date to track freshness.
If your kale starts to bolt (send up a flower stalk), it’s a sign the plant is stressed or nearing the end of its lifecycle. To delay bolting, shade the plant during hot afternoons or harvest more aggressively to redirect energy into leaf growth.
Varieties like Winterbor or Red Russian are more cold-hardy and bolt-resistant, making them ideal for fall and winter harvests. 🥬
With the right technique, your kale plant can produce harvests for 6-8 months or longer. The secret lies in patience and precision—always prioritize selective harvesting and post-harvest care. Soon, you’ll have a self-sustaining kale patch that rewards you with fresh, homegrown greens all season long. ✂️