
Tools
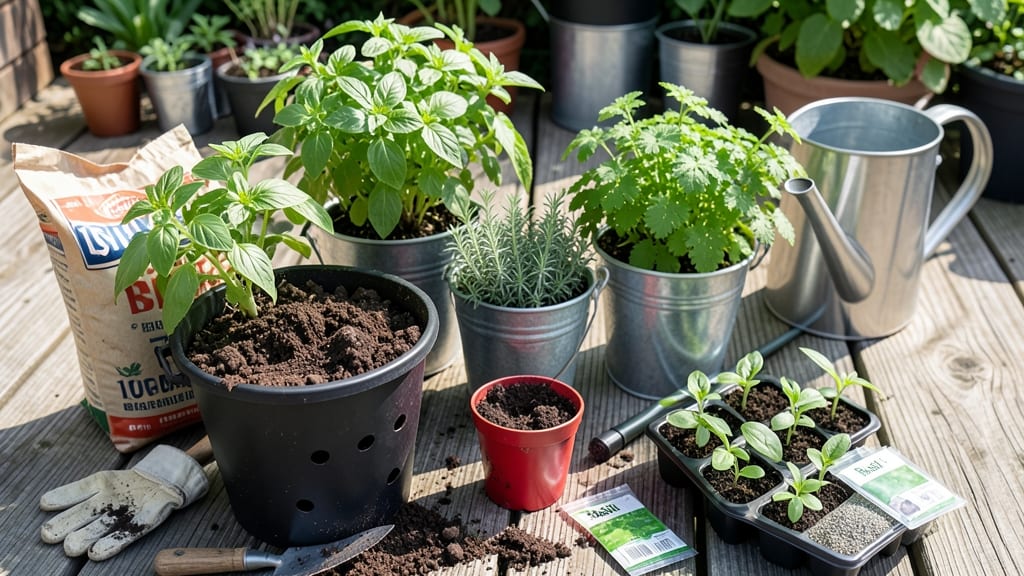
Bucket gardening 101 is your secret weapon for growing fresh herbs, veggies, and flowers in even the tiniest spaces—no yard required.
Picture this: a sunny windowsill or balcony bursting with thriving 🌱 plants you can harvest in just a few months, all from containers you already own.
Whether you're crammed in an apartment or just want to avoid the weeds, buckets turn gardening from a chore into a rewarding hobby with minimal effort.
But here’s the catch: not all buckets are created equal, and soil, drainage, and plant choices make all the difference. Skip the wrong setup, and you’ll end up with sad, wilted plants—or worse, a soggy mess.
The good news? With the right containers, soil mix, and care routine, you’ll be enjoying homegrown basil, cherry tomatoes, or peppers before summer even arrives.
In this guide, I’ll walk you through the essentials of bucket gardening 101—from picking the perfect container to keeping your plants happy all season long. No green thumb? No problem. By the end, you’ll have a foolproof system for small-space success.
Choosing the right buckets for your small-space garden
Bucket gardening transforms limited spaces into productive gardens, but the right container makes all the difference. Your choice of bucket affects drainage, root growth, and even plant health.
Whether you're growing herbs, vegetables, or flowers, selecting the perfect bucket ensures your plants thrive without crowding. Let’s break down the best materials, sizes, and modifications to maximize your small-space garden’s potential.
Not all buckets are created equal—materials like plastic, fabric, and metal each offer unique benefits (and drawbacks) for your plants. For example, plastic buckets are lightweight and affordable, while fabric grow bags mimic natural soil conditions better.
Understanding these differences helps you avoid common pitfalls like root binding or overheating. Let’s compare your options in detail below.
Drainage is non-negotiable in bucket gardening. Without proper drainage, roots suffocate, leading to rot and fungal diseases. Even if your bucket has holes, adding a layer of gravel or a drainage mat at the bottom prevents clogging. For fabric buckets, ensure the material is breathable—some cheap options trap moisture and stifle roots. Always prioritize containers with multiple drainage holes or those designed specifically for gardening.
Size matters more than you might think. A 5-gallon bucket is ideal for small plants like basil or lettuce, while larger 10-15 gallon containers support tomatoes or peppers. Overcrowding leads to competition for nutrients and poor air circulation, inviting pests.
As a rule, aim for at least 1 gallon of soil per 6 inches of plant height at maturity. For example, a 6-foot tall tomato plant needs a 10-gallon bucket or larger.
| Material | Pros | Cons | Best For | Modifications |
|---|---|---|---|---|
| Plastic | Lightweight, affordable, durable | Can overheat in sun, limited aeration | Herbs, leafy greens, small veggies | ✂️ Cut drainage holes if needed |
| Fabric | Excellent aeration, mimics soil | Dries out faster, less stable | Tomatoes, peppers, root veggies | 💧 Water more frequently |
| Metal | Sturdy, good heat retention | Heavy, can rust, may overheat roots | Heavy plants like squash | 🌡️ Use insulation liner |
| Ceramic | Aesthetic, retains moisture | Heavy, fragile, limited size options | Decorative herbs, flowers | 🪴 Place in partial shade |
Plastic buckets are the budget-friendly choice for beginners, but they require extra attention to prevent overheating. Paint them white or use reflective mulch to reduce heat absorption. Fabric grow bags, on the other hand, are perfect for deep-rooted plants like tomatoes because they allow roots to spread naturally.
Just be prepared to water them daily in hot weather. Metal buckets are ideal for heavy plants but need insulation to protect roots from extreme temperatures.
Don’t overlook bucket modifications that can extend your plants’ lifespan. For example, adding a wicking system with a reservoir keeps soil consistently moist, while self-watering bases reduce your maintenance time. You can also repurpose household items like clean food buckets or old wheelbarrows—just ensure they’re food-safe and have drainage.
Get creative! A 5-gallon paint bucket with holes drilled in the bottom makes a great herb garden.
If you’re growing root vegetables like carrots or beets, opt for deep containers (at least 12 inches tall) to accommodate their growth. Shallow buckets work for leafy greens or herbs, but avoid them for plants with extensive root systems.
Pro tip: Stack buckets vertically to save space, but ensure each plant gets enough light and airflow. A windowsill herb garden in stacked buckets is a great way to maximize a tiny kitchen space.
One common mistake is ignoring the bucket’s weight when full. A 15-gallon bucket of soil can weigh over 50 pounds—heavy enough to damage patios or balconies. Use casters or place buckets on stable surfaces to prevent accidents.
For windy areas, secure buckets with bungee cords or anchor them to a railing. Always test your setup before planting to ensure stability.
Finally, think about mobility. If you need to move your garden (e.g., for seasonal sunlight changes), choose buckets with handles or whe
Best soil mixes and fertilization for bucket gardening success
Bucket gardening thrives on the right soil mix and nutrient balance. Unlike in-ground gardens, containers dry out faster and deplete nutrients quicker, so customizing your mix is key.
I’ve found that 50% potting soil, 30% compost, and 20% perlite creates the perfect airy, water-retentive blend for most plants. This ratio prevents compaction while keeping roots oxygenated—critical for herbs and greens that hate soggy roots.
For tomatoes and peppers, add a handful of worm castings to boost nitrogen early in the season. These heavy feeders demand more nutrients, and organic matter helps retain moisture longer.
I swear by mixing in 1 cup of coffee grounds per 5-gallon bucket too—they’re a free, nitrogen-rich fertilizer that also repels pests. Just avoid overdoing it, as too much can acidify the soil.
| Plant Type | Ideal Soil Mix | Fertilizer Type | Water Retention Tip |
|---|---|---|---|
| Herbs (basil, parsley) | 50% potting soil, 30% coco coir, 20% sand | Fish emulsion (every 3 weeks) | Add 1 tbsp hydrogel crystals |
| Vegetables (tomatoes, peppers) | 60% potting soil, 20% compost, 20% perlite | Balanced 10-10-10 (every 4 weeks) | Mulch with straw to slow evaporation |
| Flowers (marigolds, nasturtiums) | 40% potting soil, 40% compost, 20% bark fines | Bone meal (at planting) | Use self-watering buckets |
| Fruit (strawberries) | 50% potting soil, 30% peat moss, 20% perlite | Epsom salt (monthly for magnesium) | Drip irrigation system |
When it comes to fertilizers, I recommend starting with organic options like compost tea or seaweed extract for gentle, nutrient-rich feeding. Synthetic fertilizers can burn roots if overapplied, especially in small containers.
For a DIY nutrient booster, blend 1 part banana peels (potassium), 1 part eggshells (calcium), and 1 part wood ash (phosphorus) into your soil. This trio tackles the most common deficiencies—yellowing leaves (nitrogen), blossom end rot (calcium), and weak stems (potassium).
Water retention is another game-changer. I’ve had the best luck adding hydrogel crystals or coco coir to my mixes—they hold 3x more water than regular soil without suffocating roots. For succulents and cacti, swap perlite for pumice to improve drainage while still retaining enough moisture.
Always water until it drains from the bottom; overwatering is the #1 killer of container plants, even more than underwatering.
Finally, rotate crops annually to prevent nutrient depletion. If you grew tomatoes in a bucket last year, switch to leafy greens this season—they have lighter feeding needs. I also top-dress with a thin layer of compost every 2-3 months to refresh nutrients naturally.
With the right mix and a little TLC, your bucket garden will outperform in-ground plots—no space wasted, no weeds, just pure productivity!