
Container Gardens
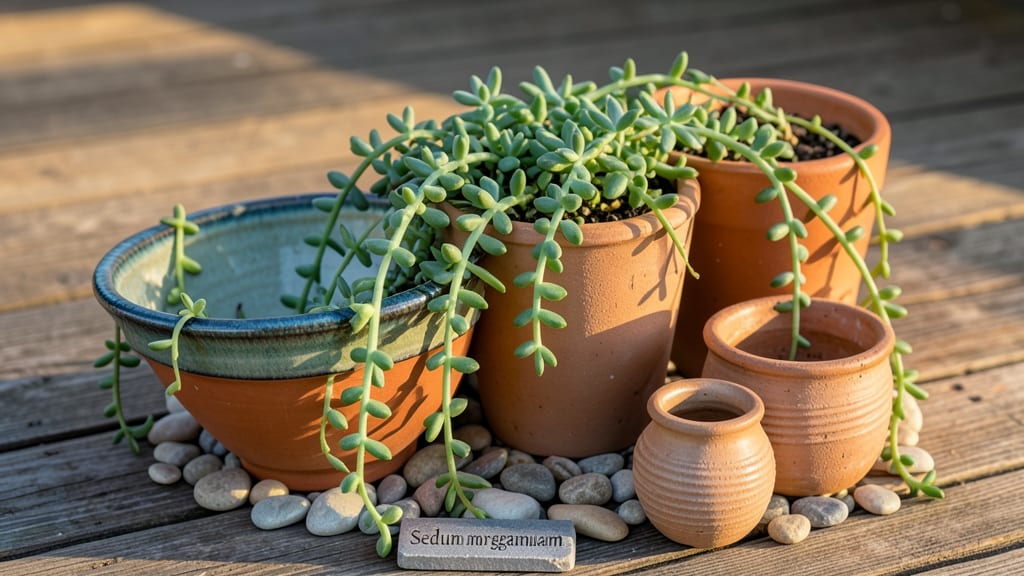
Using clay garden pots 🏺 can transform your outdoor space with timeless elegance—but their natural beauty often fades faster than expected.
That’s because clay’s porous charm comes with a trade-off: cracks from freeze-thaw cycles, fading from sun exposure, and root rot from poor moisture control. The good news? With the right care, your pots can last decades while staying as stunning as the day you bought them.
From winterizing techniques to plant pairings that protect (not destroy) your pots, this guide covers the 5 proven ways to keep them looking fresh and functional. No more guessing—just science-backed strategies for pots that stay beautiful season after season.
Ready to learn how? We’ll start with the root causes of clay pot failure—and how to fix them before they start.
Why clay pots crack, fade, and fail (and how to fix it)
Clay garden pots are beloved for their timeless beauty and natural breathability, but they’re also notoriously fragile. The porous nature of unglazed clay makes them susceptible to cracking from freeze-thaw cycles, while root pressure and intense sun exposure can cause fading or structural damage over time.
If you’ve ever found your once-charming pot split down the middle or bleached by UV rays, you’re not alone. The good news? Understanding the science behind these failures lets you prevent damage and revive old pots with simple, science-backed fixes.
One of the biggest culprits is temperature fluctuations. Clay absorbs moisture like a sponge, and when water freezes inside the pores, it expands—creating micro-cracks that grow over time.
Even in milder climates, daily heating and cooling can stress unglazed clay, leading to surface spalling (where small flakes break off). Meanwhile, aggressive root systems, like those of mature shrubs, exert pressure against the pot’s walls, causing structural cracks that compromise drainage and stability.
Sun exposure is another silent destroyer. While clay’s natural terracotta color adds warmth to your garden, prolonged UV radiation breaks down the mineral composition, causing fading and weakening over years.
Even glazed clay pots aren’t immune—the sealant can degrade, leaving your pots vulnerable to moisture absorption and stain penetration from soil minerals. The key to long-term success? Proactive care tailored to your climate and pot type.
⚠️ WARNING: Common Clay Pot Killers
Freeze-Thaw Damage: Water absorbed by clay expands when frozen, causing irreversible cracks in unglazed pots. Even one freeze-thaw cycle can weaken a pot’s structure over time.
Root Pressure: Plants like roses or citrus trees develop roots that circumvent the pot’s walls, leading to bulging or shattering. Small cracks start as hairline fractures before becoming full breaks.
UV Fading: Unprotected clay loses its rich terracotta hue within 2–3 years of sun exposure. Glazed pots fade slower but can yellow or chalk if the sealant degrades.
Moisture Imbalance: Overwatering causes soil salts to crystallize in the pores, while underwatering leads to dry, brittle clay. Both extremes accelerate structural degradation.
Let’s start with the most common issue: cracking due to temperature shifts. If you live in a region with freezing winters, unglazed clay pots are especially at risk. The solution? Winterizing your pots before the first frost.
I recommend emptying pots of soil and plants, then storing them in a dry, insulated space like a garage or shed. For pots you can’t move, wrap them in bubble wrap or frost cloth to insulate against rapid temperature changes.
Pro tip: Glazed clay pots handle cold better but can still crack if filled with wet soil—always drain them thoroughly before winter storage.
For root pressure-related cracks, the fix starts with plant selection. Avoid planting deep-rooted perennials like lavender or large shrubs in small clay pots—their roots will outgrow the container and stress the walls. Instead, opt for shallow-rooted plants like herbs (basil, thyme), succulents, or annuals (petunias, marigolds).
If you already have a cracked pot from overzealous roots, seal minor cracks with a food-grade silicone sealant (like Gorilla Waterproof Sealant) to prevent further damage. For larger cracks, consider retiring the pot for decorative use or repurposing it as a cache pot.
Fading is often the most cosmetic but frustrating issue, especially for glazed pots that lose their vibrant color over time. The culprit? Ultraviolet light breaks down the glaze minerals, causing a dull, chalky finish.
To revive faded clay, try a gentle acid wash with white vinegar and water (1:1 ratio). Scrub the pot with a soft-bristle brush, then rinse and reapply a food-safe sealant to restore protection.
For unglazed pots, a beeswax polish can enhance the natural terracotta tone while adding a protective barrier against future fading.
Moisture management is the secret weapon for preventing all three major issues. Clay’s porous nature means it absorbs and releases moisture quickly, which is great for plant roots but disastrous for pot longevity.
To balance moisture levels, I swear by these two tricks: Use a moisture meter to check soil before watering (clay pots dry out faster than plastic), and add a layer of gravel at the bottom for improved drainage.
For outdoor pots, elevate them off the ground with pot feet or bricks to prevent water pooling and soil salt buildup, which accelerates cracking.
If you’re dealing with stains or mineral deposits from soil or water, a hydrogen peroxide soak works wonders. Mix 1 part 3% hydrogen peroxide with 2 parts water, soak the pot for 1–2 hours, then scrub with a stiff brush.
This breaks down organic stains without damaging the clay. For persistent stains, a bleach solution (1:10 ratio) can be used, but rinse thoroughly to avoid chemical residue in your soil.
Choosing the right glaze or sealant can make all the difference. Unglazed clay is breathable and eco-friendly but requires more maintenance. Glazed clay, on the other hand, is more durable and resistant to stains, but poor-quality glazes can trap moisture, leading to mold or root rot.
If you’re sealing an unglazed pot, opt for non-toxic, plant-safe sealants like AFM Safecoat or beeswax
5 Proven techniques to restore and protect your clay pots
Clay pots are stunning additions to any garden, but their porous nature makes them vulnerable to cracks, fading, and root rot. The key to preserving them lies in proactive care—whether you're dealing with winter damage, surface restoration, or plant compatibility.
I’ve tested these techniques in my own garden, and they’ve saved my favorite clay pots from becoming garden trash.
First, understand that unglazed clay breathes differently than glazed varieties. Unglazed pots wick moisture, which helps prevent root rot but requires consistent watering. Glazed pots retain moisture longer, making them better for drought-prone plants like succulents.
Knowing this helps you choose the right restoration method for your specific pot type.
-
1Winterize with insulation: Wrap pots in burlap or bubble wrap before the first frost. Fill them with dry leaves or straw to prevent cracking from freeze-thaw cycles. Store them in a garage or shed if possible, but never stack them—this causes stress points.
-
2Seal cracks safely: Use a food-grade sealant like silicone caulk or hydrocal (a hydraulic cement). For minor cracks, mix plaster of Paris with water to fill gaps. Avoid epoxy—it traps moisture and accelerates rot. Let repairs dry for 24 hours before replanting.
-
3Revitalize faded surfaces: Soak pots in a vinegar-water solution (1:3 ratio) to remove mineral deposits. For discoloration, scrub with a stiff brush and baking soda paste. Avoid bleach—it weakens the clay over time. Rinse thoroughly and dry in sunlight to restore their natural terracotta hue.
-
4Choose root-friendly plants: Opt for shallow-rooted plants like basil, thyme, or petunias to avoid root pressure that cracks pots. For larger plants (e.g., tomatoes), use glazed clay or add a liner to protect the pot. Avoid aggressive vines like morning glories—they’ll split your pots in weeks.
-
5Use commercial protectants: Apply a clay pot sealant like Thompson & Morgan Clay Pot Seal or Miracle-Gro Clay Pot Food to strengthen surfaces. For extra durability, coat the inside with a light layer of beeswax before planting—it repels moisture without suffocating roots.
One of my biggest mistakes was ignoring drainage holes—clay pots need them to prevent root rot. If your pot lacks holes, drill them yourself using a masonry bit.
For extra protection, place a layer of pebbles at the bottom before adding soil. This mimics natural drainage and keeps roots healthy.
Finally, rotate your pots every few weeks if they’re in direct sunlight. This prevents uneven fading and ensures all sides receive equal exposure. I’ve seen pots develop sunburnt patches when left in one spot too long—don’t let that happen to yours!
With these techniques, your clay pots will stay beautiful and functional for years to come.
🌱