
Picking
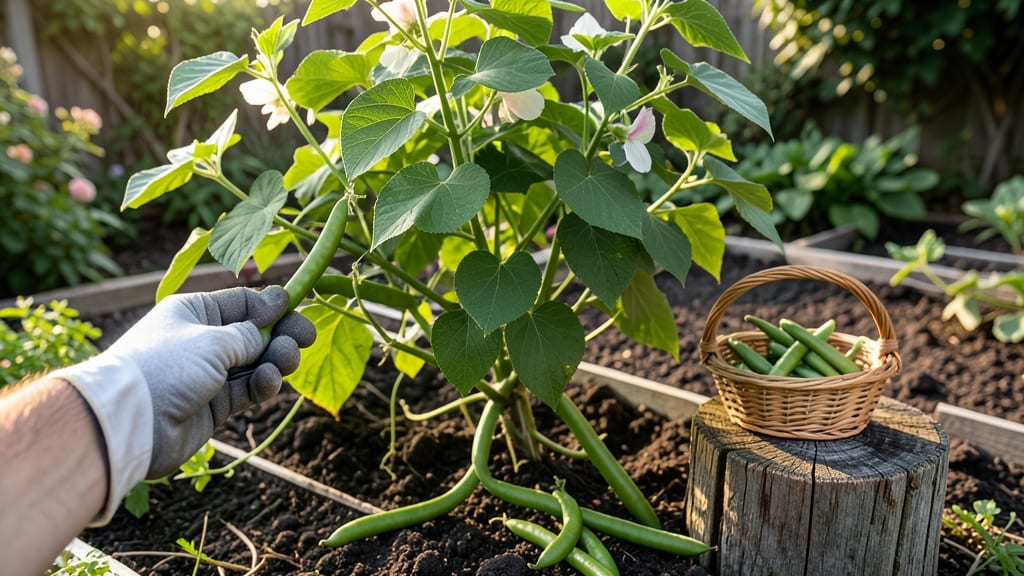
To pick beans from your garden at the perfect time means snagging crisp, flavorful pods before they turn tough and stringy—so timing is everything.
Picture this: you’re standing in your garden, surrounded by lush 🌱 green bean plants, when you spot a pod that’s just right—plump, vibrant, and ready to harvest. But how do you know it’s the moment? Miss it, and you’re left with bitter, overripe beans that no one wants.
Most gardeners wait until pods are 4-6 inches long and snap easily when bent, but there’s more to it than just size. The color, texture, and even the seeds inside can tell you exactly when to reach for your harvesting scissors.
In this guide, I’ll walk you through the 3 visual cues that guarantee you pick your beans at peak freshness—so you can enjoy that perfect crunch and flavor every time.

3 Visual cues to identify perfectly ripe garden beans
Harvesting beans at the right moment transforms your garden into a flavor factory—creamy, sweet pods packed with freshness. But timing is everything: pick too early, and you’ll get bland, underdeveloped beans; too late, and they turn tough and stringy.
The key lies in three visual cues that reveal when beans are at their peak. These work for bush beans, pole beans, and even snap peas, so you can apply the same rules across your garden.
First, focus on pod size, which is the most obvious clue. Most bean varieties reach ideal harvest size between 4 to 6 inches long. For example, Blue Lake beans should be about 5 inches, while Romano beans can stretch to 6 inches before they toughen up.
Measuring with your thumb can give you a quick reference—if the pod spans from your thumb tip to your first knuckle, it’s likely ready.
Next, examine the pod color. Perfectly ripe beans should be a deep, vibrant green, not pale or yellowing. Some heirloom varieties, like Kentucky Wonder, might have slight streaks or darker hues, but the overall tone should be consistent and rich.
Avoid pods with uneven coloration or dull patches, as these signal overripeness or stress from uneven watering.
Finally, test the pod texture with a gentle squeeze. Ready-to-harvest beans should feel firm yet slightly plump, almost snapping when you apply light pressure. If they bend like a bow without resistance, they’re past their prime.
Overripe beans also develop a woody or fibrous texture, making them unpleasantly tough to eat.
| 🌱 Bean Maturity Guide: Visual Cues for Perfect Harvest | |||
|---|---|---|---|
| Bean Type | Pod Size | Color & Texture | Seed Development |
| Bush Beans (e.g., Blue Lake) | 4-5 inches (thumb to knuckle) | Deep green, firm, snaps crisply | Seeds visible but not bulging |
| Pole Beans (e.g., Kentucky Wonder) | 5-6 inches (longer varieties) | Rich green, slightly plump, no soft spots | Seeds small and round, not filling pod |
| Snap Peas (e.g., Sugar Snap) | 2-3 inches (compact pods) | Bright green, crisp when bent, no wrinkles | Seeds tiny or invisible inside |
| ⚠️ Overripe Signs: Pods >6", dull color, woody texture, seeds filling pod | |||
| ✅ Perfect Pick: Firm, vibrant, snaps easily, seeds barely visible | |||
Don’t overlook the seed development inside the pod, which is a hidden but critical clue. When beans are ready, the seeds should be visible through the pod but not yet pressing against the sides.
For example, in Romano beans, you’ll see tiny white or beige seeds, while snap peas might have almost invisible specks. If the seeds are large and filling the pod, the bean has passed its prime and will taste bitter or starchy.
For snap peas, the rules are slightly different because their pods are edible and should be harvested even younger. Aim for pods that are 2 to 3 inches long and bright green with a slight curve.
The texture should be crisp and snappy, almost like fresh asparagus. If the pods start to straighten or develop a dull sheen, they’ve overstayed their welcome in the garden.
Pro tip: Use a harvesting schedule to stay on top of your bean crop. Most varieties produce new pods every 3 to 5 days, so check your plants frequently—especially in hot weather, when beans mature faster.
A quick morning harvest keeps your plants productive and encourages more pod formation. Plus, harvesting in the cool morning hours means you’ll enjoy beans at their freshest and most flavorful.
One common mistake is assuming all beans follow the same rules. Heirloom varieties, like Scarlet Runner beans, can have slightly different color patterns or larger pods, so always check the seed packet for specific guidance.
And remember, pole beans often need a little more time to reach full size compared to bush varieties, so give them a few extra days if they’re lagging behind.
By mastering these three visual cues—pod size, color, and texture—you’ll transform your garden into a bean harvest machine. Soon, you’ll be picking pods at the perfect moment, every time, and enjoying homegrown beans that rival anything from the store. Happy harvesting! 🌱
How to check bean maturity without damaging plants
Harvesting beans at the perfect moment ensures maximum flavor and tenderness, but checking maturity without harming your plants requires gentle techniques. The key is to test pods carefully—never yanking or twisting—which can damage vines and reduce future yields.
I’ve found the pod snap test and seed development stages are the most reliable methods for determining when beans are ready.
Start by examining the pod length and color consistency. Mature beans typically reach 4-6 inches long with a deep, even green hue. If pods are shorter or pale, they’re not ready yet.
For pole beans, check the vine growth stage—flowers should have faded, and pods should appear plump but not overfilled.
Here’s how to test maturity without damaging your plants:
- 1 Gently grasp the pod between your thumb and forefinger, avoiding the stem. Apply light pressure to test firmness—it should feel crisp but not hard.
- 2 Perform the snap test: Bend the pod slightly away from the vine. If it snaps cleanly with a slight crack, it’s ready. A dull bend or no sound means it’s underripe or overripe.
- 3 Check seed visibility: Look through the pod’s seam. Seeds should be visible but not bulging. If seeds fill the pod, harvest immediately to prevent tough, fibrous texture.
- 4 Use harvesting tools like pruning shears or garden scissors to cut pods at the stem. Avoid pulling—this can uproot younger pods or damage the vine.
- 5 Wear gloves if your plants have thorns (like pole beans) or if you’re harvesting frequently. This protects your hands and keeps the pods clean for storage.
Timing matters too—harvest beans in the morning when pods are cool and crisp. This is when their natural sugars peak, ensuring the best flavor. Overripe beans left on the vine can cause the plant to stop producing, so check your garden every 2-3 days during peak season.
Pro tip: If you’re unsure, harvest a few pods to taste-test. Underripe beans taste bland, while overripe beans become tough and lose sweetness. With practice, you’ll train your eye to spot the perfect moment—no damage required!
🌱