
Tools
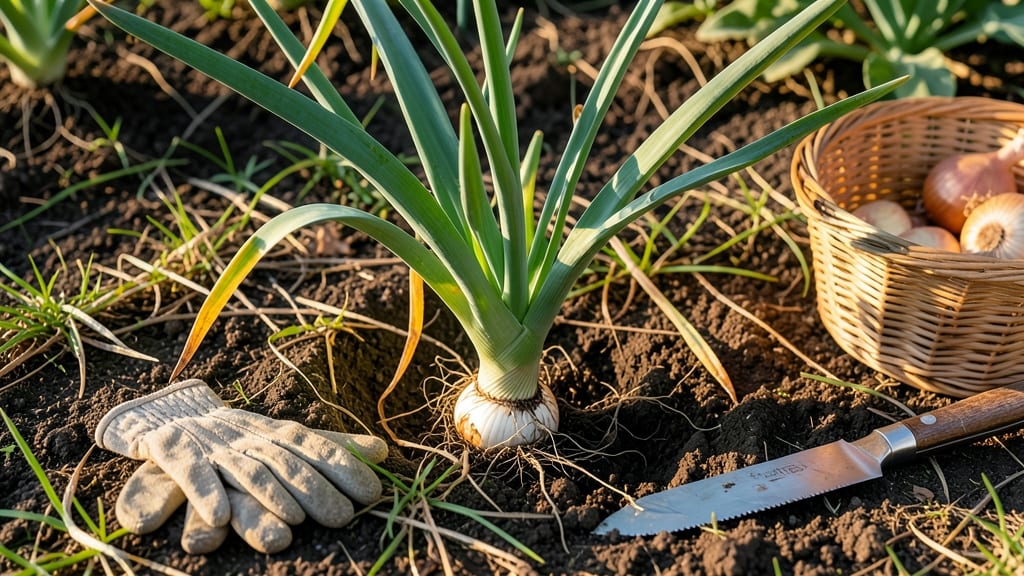
Pulling onions from your garden at the right time ensures perfect flavor, size, and storage life — and missing those cues can turn a great harvest into a wasted crop.
You’ve nurtured your 🧅 plants all season, but one wrong move in timing means bulbs that split, rot, or lose their sweetness. The key? Watching for three critical signs: leaf color shifts, bulb firmness, and soil conditions that tell you exactly when to dig.
In cooler climates like USDA Zone 6a, onions often mature by June or July, but heat waves or late rains can throw off schedules. Whether you’re growing storage onions or fresh varieties, knowing these signals saves hours of guesswork — and keeps your harvest from going to waste.
Below, I’ll break down the top 3 soil and leaf cues to pull onions at peak ripeness, plus regional adjustments and storage tips to make your harvest last all winter.
3 Critical soil & leaf cues to know when onions are ready for harvest
Knowing the perfect harvest time for onions can mean the difference between flavorful storage onions and bland, rotting bulbs. The key lies in watching leaf color changes, bulb size, and soil conditions—three critical cues that tell you when to pull onions from your garden.
Ignore these signs, and you might end up with onions that split, rot, or simply lack the sweetness you crave.
For storage onions, timing is everything. Harvest too early, and the bulbs won’t keep well; wait too long, and they’ll become overripe and pungent. The good news? These visual and tactile clues make it easy to spot the ideal moment.
Start by examining the leaf tops—they’re the first to show you whether your onions are ready.
Leaf color is your first indicator. When the green tops begin yellowing and falling over naturally, it’s a clear signal that the bulb below has reached maturity. This process usually takes about 110 days after planting, but it can vary based on your climate zone and onion variety. Don’t rush it—wait until at least 50% of the leaves have turned yellow before digging.
| Cue | What to Look For | Action |
|---|---|---|
| Leaf Color | 50-75% of tops turn yellow and flop over | Check bulb size next |
| Bulb Size | 1-2 inches in diameter (firm, not soft) | Gently loosen soil to test |
| Soil Conditions | Dry soil (1-2 inches deep) and warm weather (above 70°F) | Harvest on a dry, sunny day |
| Skin Texture | Dry, papery and no longer glossy | Perfect for storage |
Next, focus on the bulb size. Mature onions should be about 1-2 inches in diameter when you slice them open. If they’re smaller, they’re likely not fully developed, while larger bulbs may have already started to split or rot.
To test, gently loosen the soil around the base of the plant and check the bulb’s size. If it feels firm and round, it’s ready for harvest.
Don’t overlook the soil conditions—they play a huge role in determining whether your onions will store well. The soil should be dry 1-2 inches deep and the weather should be warm (above 70°F).
Harvesting in damp soil can lead to rot, while dry conditions help the bulbs cure properly. Plan to harvest on a sunny, dry day to give your onions the best chance at long-term storage.
For fresh-use onions, you can harvest slightly earlier when the bulbs are still firm but the tops haven’t fully yellowed. These onions won’t store as long, but they’re perfect for immediate cooking.
The key difference? Storage onions need that extra time to develop a thick, dry skin, while fresh onions can be pulled when the bulbs are just plump and the leaves are still mostly green.
One common mistake is waiting until the leaves are completely brown and crispy. By then, the bulbs may have already split or become pungent. Instead, aim to harvest when the leaves are 50-75% yellowed.
This gives you the best balance of flavor, size, and storage potential. Pro tip: Use a garden fork to gently lift onions from the soil—this minimizes damage to the bulbs and keeps them intact.
Regional differences matter too. In warmer climates (Zones 8-10), onions may mature faster and require earlier harvesting, while cooler zones (Zones 3-6) might need an extra week or two. Always adjust your timing based on your local growing conditions.
If you’re unsure, do a quick test: Dig up one onion and check its size and skin texture—this gives you a real-time snapshot of readiness.
Finally, remember that onion varieties differ in their ideal harvest times. Storage varieties like ‘Yellowstone’ or ‘Sweet Sandwich’ need that extra time to develop a dry skin, while green onions or scallions can be harvested much earlier when the shoots are tender.
Always check the seed packet recommendations for your specific variety to fine-tune your timing.
Mastering these three critical cues—leaf color, bulb size, and soil conditions—will transform your onion harvest from hit-or-miss to consistently flavorful and long-lasting. Next time you’re in the garden, take a closer look at your onions before pulling them—your future meals will thank you! 🧅
How to test onion maturity: a step-by-step guide for gardeners
Knowing exactly when to pull onions from your garden can mean the difference between a flavorful, storable harvest and a disappointing loss. Even experienced gardeners sometimes struggle to pinpoint the perfect moment—especially when dealing with short-day vs. long-day varieties.
The good news? A few simple visual cues and hands-on tests will give you the confidence to harvest at peak maturity.
First, focus on the leaf color and bulb size, which are the most reliable indicators. Over-mature onions split or rot, while under-mature ones lack flavor and storage life.
This step-by-step guide will walk you through the exact process to test maturity without damaging your crop, ensuring you get the best results every season.
- 1
- 2
- 3
- 4
- 5
For short-day varieties (like Texas Early White), you’ll often see maturity signals earlier—sometimes as soon as 90 days. Meanwhile, long-day varieties (like Yellow Sweet Spanish) may take up to 120 days to reach peak harvest. Always adjust your timing based on your specific variety and local climate.
If you’re unsure, sample a few onions from different plants. This gives you a better sense of the average maturity across your garden. Remember, onions harvested too early won’t store well, while those left too long risk splitting or rotting in the ground.
Once you’ve mastered these steps, you’ll never second-guess your onion harvest again. The key is patience and observation—your onions will thank you with a flavorful, long-lasting harvest that keeps you cooking all winter long. 🧅