
Container Gardens
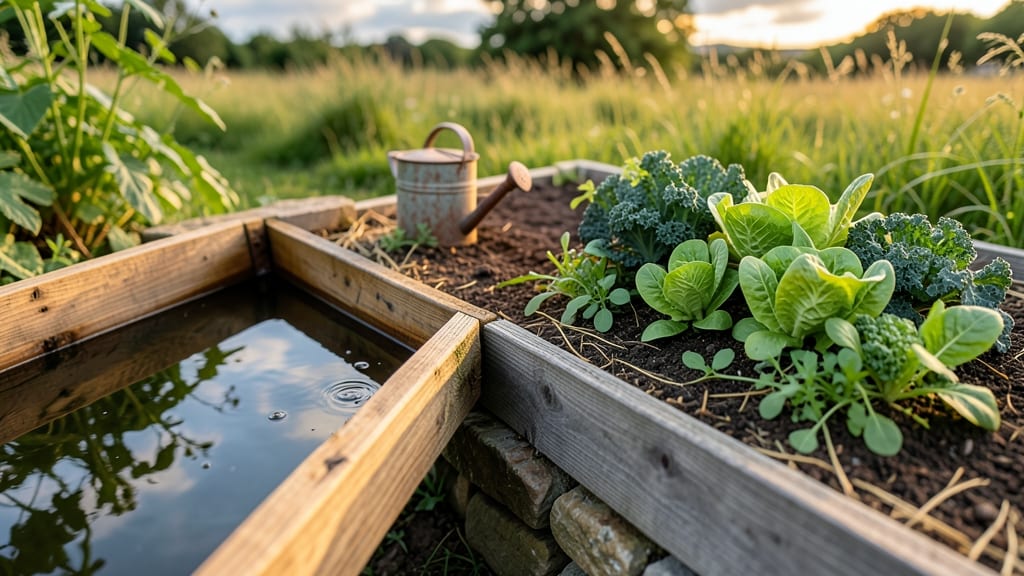
Repurposing old water troughs into raised garden beds is a game-changer for small yards and urban spaces where every inch counts.
Imagine turning a rusty old trough into a lush, productive garden that saves water, space, and even money—without sacrificing beauty. These containers are perfect for growing herbs, veggies, or flowers with minimal fuss, and they add a rustic, industrial charm to your outdoor space.
Whether you're a beginner or a seasoned gardener, converting water troughs into functional beds is easier than you think. With the right drainage, soil mix, and layout, you can create a thriving garden that maximizes your growing area and reduces water waste.
In this guide, I’ll walk you through everything from cleaning and modifying your troughs to designing space-saving layouts and picking the best plants for container growing. Let’s get started!


How to convert water troughs into functional raised garden beds
Repurposing old water troughs into raised garden beds is one of my favorite DIY gardening projects. These sturdy containers are perfect for growing herbs, vegetables, and flowers while saving space and water. The best part?
Most troughs are free or inexpensive if you check local farms, ranches, or even Craigslist. With a few simple modifications, you’ll have a functional, stylish garden that’s ready for planting.
Before you start, gather your essential tools and materials. You’ll need a clean trough, drill or jigsaw for drainage holes, landscape fabric, a high-quality potting mix, and optional liners if your trough has a plastic or metal interior.
Safety gear like gloves and goggles is also a must when working with power tools. Once you’ve got everything ready, you’re just a few steps away from transforming that trough into a thriving garden bed.
Step-by-Step Guide to Repurposing Water Troughs
-
Step 1: Clean the Trough
Scrub the inside and outside with soapy water and a stiff brush to remove dirt, algae, or old residue. Rinse thoroughly and let it dry completely in the sun to kill any remaining bacteria or pests. For stubborn stains, a mix of vinegar and water works wonders. -
Step 2: Inspect for Damage
Check for cracks, rust, or weak spots. If the trough has plastic liners, ensure they’re intact. For metal troughs, sand down any sharp edges to prevent injury while gardening. Skip damaged troughs—they won’t hold up well long-term. -
Step 3: Add Drainage Holes
Use a drill or jigsaw to create 1-2 inch holes along the bottom of the trough. Space them evenly to prevent soil compaction. For extra drainage, add holes along the sides near the base. Cover holes with landscape fabric to keep soil in place. -
Step 4: Line the Trough (Optional)
If your trough lacks a liner, use pond liner material or heavy-duty plastic to prevent soil leaks. Cut it to fit snugly, leaving a 2-inch overhang on the sides. Secure it with staples or waterproof adhesive. This step is crucial for plastic or fiberglass troughs. -
Step 5: Layer for Drainage
Add a 2-inch layer of gravel or small rocks at the bottom for drainage. Top it with a layer of perforated landscape fabric to keep soil from mixing with the gravel. This ensures excess water drains efficiently while keeping roots healthy. -
Step 6: Fill with Soil Mix
Use a high-quality potting mix blended with compost or aged manure for nutrients. Avoid garden soil—it compacts easily and drains poorly. Fill the trough to 2-3 inches below the rim to allow for mulch and plant growth. -
Step 7: Plant Your Garden
Choose shallow-rooted plants like lettuce, herbs, or strawberries. Space them according to their mature size, and water thoroughly after planting. For a longer growing season, consider adding a mulch layer to retain moisture and suppress weeds. -
Step 8: Position for Success
Place your trough in a spot with 6+ hours of sunlight daily. If growing shade-loving plants, choose a partially shaded area. Elevate the trough on feet or bricks to improve drainage and prevent water pooling.
One of the biggest advantages of using water troughs as raised beds is their water retention. The curved shape helps conserve moisture, reducing the need for frequent watering. I’ve found that troughs hold up to 30% more water than traditional rectangular beds, making them ideal for drought-prone areas.
Just be sure to monitor soil moisture—especially during hot summers—and adjust your watering schedule accordingly.
For added functionality, consider painting or staining your trough to match your garden’s aesthetic. A fresh coat of weather-resistant paint not only looks great but also protects the material from the elements. If you’re feeling creative, add decorative rocks or solar-powered lights around the base to enhance the visual appeal.
The key is to keep it simple—your plants will thank you for the focus on their needs over ornamentation.
If you’re new to container gardening, start with easy-to-grow plants like basil, thyme, or radishes. These thrive in confined spaces and give you quick results. As you gain confidence, experiment with tomatoes, peppers, or even dwarf fruit trees.
Remember, the depth of most troughs (12-18 inches) is perfect for shallow-rooted vegetables, so avoid deep-rooted crops like carrots or potatoes.
Finally, don’t forget to rotate your plants each season to prevent soil depletion. I like to swap out herbs for vegetables or flowers to keep my troughs productive year-round.
With a little planning and care, your water trough garden will become the envy of your neighborhood—and a testament to sustainable, creative gardening.
7 Space-saving water trough garden layouts for small yards
Small yards don’t mean small gardens! With water trough raised garden beds, you can create stunning vertical displays and maximize every inch of space. These layouts transform ordinary containers into functional growing areas while adding visual interest to compact areas.
Whether you have a balcony, patio, or tiny backyard, these designs prove that big harvests are possible in small spaces.
One of my favorite layouts is the vertical stack system, where I place multiple troughs at different heights. This not only saves floor space but also creates a dynamic, tiered look.
For example, I use shallow troughs for herbs like basil and thyme at the top, where they get the most light, and deeper ones for root vegetables like carrots or radishes at the bottom. The key is ensuring each level has proper drainage and access for watering.
Here’s a quick comparison of the best space-saving water trough layouts to inspire your small garden design:
Another clever idea is the corner triangle layout, where I place two troughs at a 90-degree angle to fill an otherwise unused corner. This works perfectly for growing tomatoes or peppers, which need a bit more space but still thrive in containers.
I’ve also seen gardeners use this setup to create a cozy seating nook with built-in planters on either side.
For those with a fence or trellis, a tiered wall mount is a game-changer. I attach troughs horizontally at varying heights, creating a living wall that’s both functional and decorative.
This layout is ideal for shallow-rooted plants like green onions or radishes, which grow quickly and don’t require deep soil. Plus, the vertical space keeps them out of the way while maximizing your growing area.
If you’re short on floor space but have a deck or porch, consider hanging troughs. These can be suspended from hooks or chains and are perfect for growing strawberries, succulents, or trailing herbs like mint.
The key here is to use lightweight troughs and ensure they’re secured safely. I’ve even seen gardeners create a cascading effect with multiple hanging troughs at different lengths for a whimsical look.
Don’t overlook the spiral design for a unique touch! This layout involves arranging troughs in a circular or spiral pattern, often around a central post or small tree. It’s perfect for creating a focal point in your garden and works well with flowers or microgreens.
The spiral shape also makes it easier to rotate plants for even sunlight exposure, which is especially helpful in small spaces where shadows can be tricky.
Finally, for a bold statement, try a stacked pyramid. Place one large trough at the base and stack smaller ones on top, creating a tiered pyramid shape. This layout is ideal for growing peppers, eggplants, or herbs and adds a striking visual element to your garden.
Just make sure each level is stable and has proper drainage to avoid water pooling.