
Picking
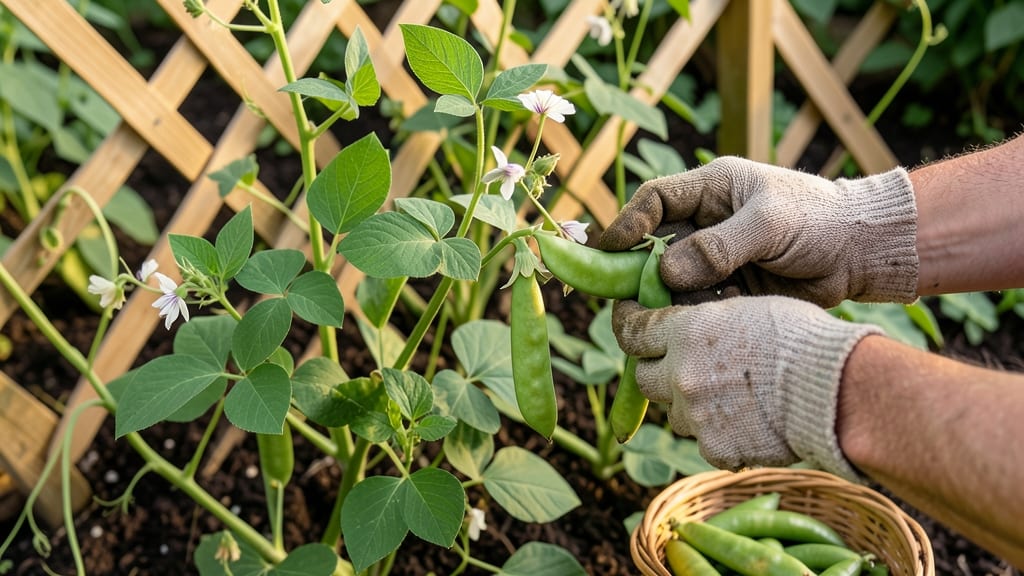
Harvesting garden peas at the right time ensures tender, sweet pods packed with flavor—wait too long, and you’ll end up with tough, stringy messes.
I’ve missed the window more times than I’d like to admit, ending up with peas that tasted like overcooked beans. The key? Knowing when those pods are at their peak—bright green, slightly plump, and just the right size.
You’ll learn how to test for readiness with a simple snap test, spot the perfect pod size, and avoid common mistakes like over-maturing or harvesting too early. Whether you’re growing sugar snaps, snow peas, or shelling varieties, these tips will help you maximize your harvest.
From visual cues like glossy pods to environmental factors like temperature, I’ll break down everything you need to know for a bountiful, delicious pea harvest every time.

How to test garden peas for perfect harvest readiness
Harvesting peas at the right moment transforms your garden into a treasure trove of sweet, tender pods. The difference between a perfect harvest and tough, stringy peas often comes down to timing and sensory cues.
I’ve learned that peas don’t wait for you—they mature rapidly, so knowing exactly when to pick ensures maximum flavor and texture.
Peas are ready to harvest when they’re at their peak sweetness and tender texture. For most varieties, this happens 60-75 days after planting, but visual and tactile clues are far more reliable than counting days.
Whether you’re growing sugar snap, snow peas, or shelling peas, these tests will help you nail the harvest window every time.
5 Step-by-Step Tests for Perfect Pea Harvest
-
1. Pod Size Check
Measure pods with your thumb and forefinger. Sugar snaps and shelling peas should be 2-2.5 inches long. Snow peas are ready at 2.5-3 inches but still flat. -
2. The Snap Test
Gently squeeze a pod sideways. It should snap easily with a slight bend but not break. If it resists, wait 1-2 days. If it crushes, you’ve missed the window! -
3. Seed Firmness Test
Open a pod and check the seeds inside. For sugar snaps, seeds should be tiny and soft. For shelling peas, they should be plump but not fully round. Overgrown seeds mean tough peas. -
4. Color & Gloss Check
Look for bright green pods with a slightly waxy sheen. Dull or yellowing pods are past their prime. Snow peas should stay flat and pale green. -
5. Daily Harvest Routine
Pick peas every 2-3 days to encourage continuous production. Use sharp scissors or your fingers to avoid damaging vines. Harvest in the morning for peak flavor.
One common mistake I see is waiting too long for peas to "get bigger." Size isn’t everything—overripe peas lose sweetness and develop woody fibers.
For example, sugar snap peas left on the vine too long can turn bitter, while shelling peas develop large, hard seeds that ruin the texture. Always prioritize firmness and color over size.
Temperature also plays a role. In cool spring weather (50-65°F), peas mature faster than in warmer fall conditions (70-80°F). If your garden is hotter than usual, check pods daily—they’ll ripen quicker. Conversely, in chilly zones, extend your harvest window by 1-2 weeks since peas grow slower.
For snow peas, focus on flatness and tenderness. They’re ready when you can easily pinch the sides without resistance.
Unlike other varieties, their seeds should remain tiny—if they bulge, the peas are overripe. Shelling peas, on the other hand, are best when the pods are plump but seeds are still small. Overripe shelling peas will have large, round seeds that dominate the pod.
Pro tip: Keep a harvest journal to track when your specific pea variety reaches peak readiness. Note the days to maturity from seed packets and adjust for your climate.
For instance, my Sugar Ann sugar snaps always hit perfection at 68 days in my Zone 6a garden, while Oregon Sugar Pod snow peas take 72 days. Small adjustments like this make a huge difference in taste and texture.
If you’re unsure whether a pod is ready, harvest a few test pods and taste them raw. Sweet, crisp peas are your goal—if they’re bland or mealy, they’re past their prime.
Remember, peas don’t store well once picked, so harvest only what you’ll use within 3-5 days for the best quality.
Finally, don’t forget to support your pea plants with a trellis or stakes. This improves air circulation, reducing disease risk and making it easier to spot ready-to-harvest pods. Happy harvesting—your garden’s sweetest rewards are just a snap away! 🌱
Best practices for harvesting peas without damaging plants
Harvesting peas at the right time keeps your plants productive and your pods sweet. I’ve learned that consistent harvesting every 2-3 days encourages more flowering and pod production. The key is to pick before seeds swell too much, or you’ll sacrifice both flavor and future yield.
Use the right tools to avoid bruising or breaking stems. A pair of sharp scissors or your fingers work best—never pull pods off by force. I always harvest in the morning when pods are cool and crisp, giving me the best texture and flavor for meals.
Overharvesting can stress your plants, but stopping too soon means wasted potential. Aim to pick 70-80% of visible pods while leaving enough for new growth. This balance keeps your pea plants thriving all season long.
Harvest Too Late = Missed Yield
Peas left on the vine beyond 75 days after planting become tough and stringy. Worse, they divert energy from new flowers and pods. Stop harvesting when pods turn yellowish or seeds fill most of the pod—this signals the plant is shifting focus to seed production.
For climbing varieties, I always harvest from the bottom up to avoid breaking tender vines. Start with the lowest pods and work your way upward. This method also prevents overloading lower stems, which can snap under the weight of too many pods.
Knowing when to stop harvesting is just as important as when to start. When your pea plants produce fewer new pods and existing ones turn yellow, it’s time to let them finish their cycle.
This prevents stress and allows the plant to store energy for next year’s growth if you’re saving seeds.
After each harvest, give your plants a quick check for pests or diseases. Remove any damaged leaves or pods immediately to prevent spread. I’ve found that healthy plants produce better yields, so a little post-harvest maintenance goes a long way.