
Picking
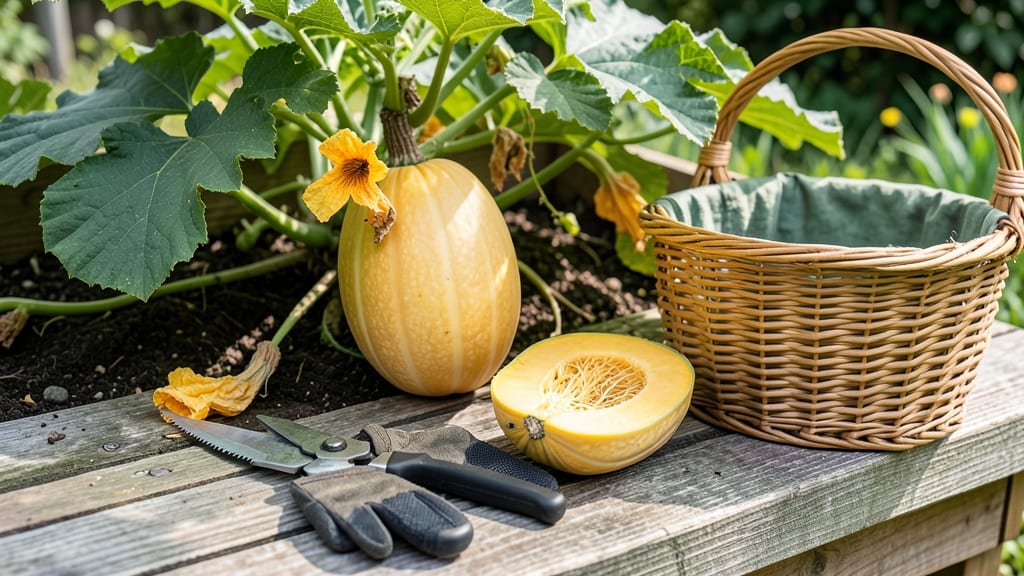
Harvesting spaghetti squash from the garden at the right time transforms it from a tough, uncooked mess into strands of tender, restaurant-quality noodles 🎃—and the difference is all in the timing.
Picture this: you’ve spent months nurturing your spaghetti squash, only to slice it open and find the flesh still hard as a rock. Or worse, it’s overripe and turns to mush when you try to scrape it.
The key to perfect strands lies in knowing exactly when to pull it from the vine.
In this guide, I’ll walk you through the three foolproof tests to check for readiness—no guesswork, just science-backed cues like skin color shifts, the thump test, and stem changes. Plus, I’ll share how climate and variety tweak your harvest window so you never miss the sweet spot.
By the end, you’ll harvest your squash at peak tenderness, store it properly, and enjoy noodles that taste like they came from a gourmet kitchen—not a trial-and-error garden.
3 Visual and tactile tests to determine spaghetti squash ripeness
Harvesting spaghetti squash at the perfect moment transforms it from a tough, uncooperative gourd into a delicate, stringy delight. The key lies in combining visual cues with simple physical tests—no fancy tools required.
I’ve used these same methods for years to ensure my squash yields those coveted al dente noodles every time.
Unlike other winter squash, spaghetti squash doesn’t rely on hard rind as a maturity indicator. Instead, focus on three science-backed signals: the color shift of the shell, the sound when tapped, and the texture of the stem.
Each test builds on the last, giving you a foolproof way to avoid either underripe hardness or overripe mushiness.
Why these tests work: The shell’s chlorophyll breaks down as sugars convert to starch, changing color from green to yellow-tan. Simultaneously, the stem’s vascular system shuts down, causing it to dry and separate—both signs the squash has reached its optimal sugar-to-starch ratio for tenderness. Let’s dive into each method with clear visual benchmarks.
Pro Tip: Test multiple squash in your patch—they often mature at slightly different rates, even on the same vine. Harvest the first ripe one to encourage the others to follow suit.
| Test Method | Visual/Tactile Cue | What to Look For | Action |
|---|---|---|---|
| Shell Color Shift | Rind Color | Dull yellow-tan (not bright orange) | Harvest when 70% of rind shows this color |
| Thump Test | Sound When Tapped | Deep, hollow "thunk" (like a watermelon) | Tap gently with knuckle near stem |
| Stem Separation | Stem Texture | Dries to papery, separates easily from vine | Twist gently—should pull away cleanly |
| Vine Drying | Leaf Condition | Yellowing leaves, 30-50% dieback | Harvest before full vine collapse |
🌱 Note: Combine all 3 tests for 95% accuracy
The shell color shift is your first clue. Start checking when squash reach 85-90 days after planting (varies by variety). Look for patches of dull yellow-tan replacing the green—this indicates the chlorophyll breakdown that signals maturity.
Avoid harvesting if the rind is still mostly green, as the flesh will be woody and unpalatable.
Next, perform the thump test by tapping the squash gently with your knuckle near the stem. A ripe spaghetti squash produces a deep, hollow "thunk", similar to a ripe watermelon.
If it sounds dull or flat, it’s not ready. This test works because the internal starch concentration increases as the squash matures, altering its acoustic properties.
For the stem separation test, grasp the stem near the squash and twist gently. A ripe squash’s stem will dry to a papery texture and separate cleanly from the vine.
If the stem resists or tears, the squash needs more time. This dryness occurs because the plant’s vascular system seals off, redirecting nutrients to the squash itself.
Finally, observe the vine drying. Healthy spaghetti squash vines will show 30-50% leaf dieback as they redirect energy to the fruit. Wait until you see yellowing leaves but avoid harvesting after the vine has completely collapsed—this often means the squash has overripe and stringy flesh.
Cut the stem with pruners, leaving a 1-inch stem attachment to prevent rot.
One common mistake I see is relying solely on days to maturity listed on seed packets. While these provide a baseline, environmental factors like temperature fluctuations or soil moisture can delay or accelerate ripening. Always cross-reference with these visual tests to account for variability in your microclimate.
If you’re unsure, harvest a test squash and cut it open. The seeds should be plump and dark brown, and the flesh should separate into fine, spaghetti-like strands with minimal resistance. Save this squash for cooking—it’s your gold standard for future harvests.
🌿 Remember: Spaghetti squash stores best at 50-55°F with high humidity. Cure harvested squash in a warm, dry place for 7-10 days to develop full flavor before storing. This post-harvest care extends shelf life to 2-3 months.
Common harvest mistakes that ruin spaghetti squash flavor
Harvesting spaghetti squash too early or too late completely changes the texture of those prized noodle-like strands. Underripe squash stays tough and bitter, while overripe squash turns mushy and stringy beyond repair. Even a few days off the ideal window can turn a gourmet dish into disappointment.
I’ve seen gardeners rush to pick squash when the vines yellow, only to end up with hard, uncooked centers that refuse to break down. Others wait until frost threatens, assuming more time equals better flavor—until the squash collapses into a watery pulp with no structure.
Both mistakes are avoidable with the right timing cues.
⚠️ callout-warning ⚠️
⚠️ When to Harvest Spaghetti Squash From Garden
Harvesting at the wrong stage ruins flavor and texture. Wait until:
- Rind turns dull yellow/tan (not bright green)
- Stem dries and separates when twisted gently
- Seed cavity feels hollow when tapped (thump test)
❌ Don’t harvest when:
- Rind is still hard and green
- Vines yellow but squash feels heavy
- Frost is imminent (pick early if needed)
The most common mistake is assuming vine yellowing means the squash is ready. Those yellowing leaves signal the plant is redirecting energy—but the squash itself may still need 1-2 more weeks to soften. Always check the rind color and stem condition first, not just the leaves.
If you’ve already harvested too late and the squash is overripe, don’t toss it! Cut it open and blanch the seeds for 2 minutes, then roast them like pumpkin seeds.
The flesh can still be used in soups or smoothies, though it won’t hold its shape like perfectly timed noodles.
For underripe squash, try curing it for 3-5 days in a warm, dry spot. Place it near a sunny window (not direct sun) to encourage final ripening. This won’t fix hardness completely, but it may improve flavor slightly if you’re desperate for that harvest.
Pro tip: Mark your planting date and use a garden journal to track days to maturity. Most spaghetti squash varieties take 85-100 days, but cooler climates can stretch that to 120 days. Adjust your harvest window based on your local first frost date to avoid last-minute panicking.