
Picking
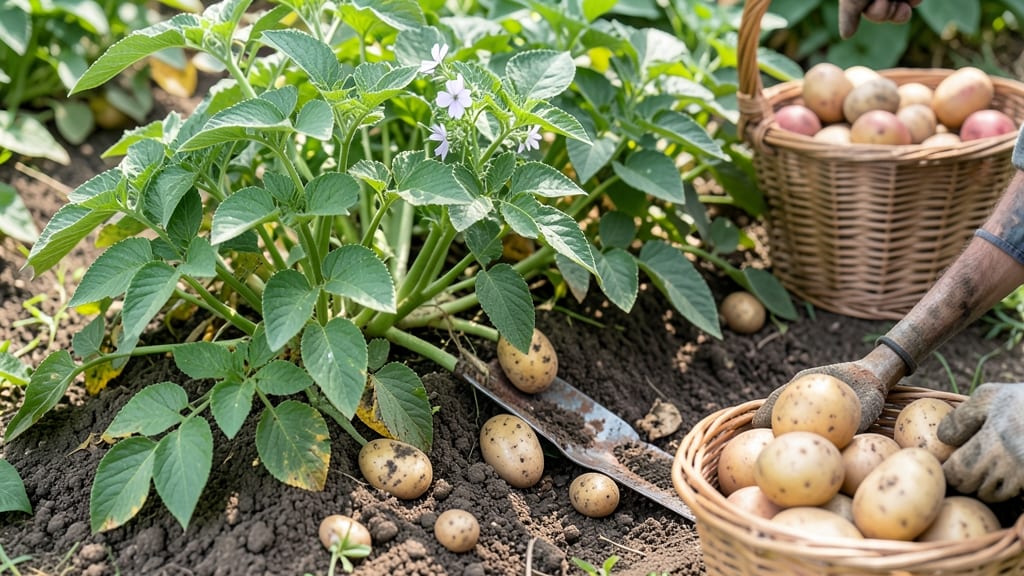
Harvesting potatoes from your garden at the right time means the difference between crisp, flavorful spuds and tough, shriveled ones.
Picture this: you dig up a potato that’s still green at the end, or one so small it collapses under your thumb. That’s the frustration of timing it wrong, and it happens more often than you’d think.
Most gardeners wait until the foliage yellows and dies back, but there’s a simpler way—just check the soil or the tuber size. I’ll show you three foolproof tests that work every year, no matter your zone.
By the end, you’ll know exactly when to pull those 🥔 from the ground for storage that lasts through winter, plus how to spot the mistakes that ruin a crop before it even ripens.

How to tell when potatoes are ready to harvest using 3 simple soil tests
Getting the timing right for your potato harvest can feel like guessing—until you know these three foolproof soil tests. Whether you're growing new potatoes or full-sized spuds, these methods take the guesswork out of harvesting.
I’ve used them in my own garden for years, and they’ve never failed me. The key is paying attention to subtle clues your plants give you before you even dig.
Harvesting too early means small, underdeveloped potatoes, while waiting too long risks sprouting tubers or even rot in the soil. The good news? You don’t need fancy tools or years of experience.
Just your hands, a little patience, and these three simple checks. Let’s dive into how to tell when your potatoes are begging to be pulled from the earth.
The Soil Probe Test
Use a garden fork or your fingers to gently probe the soil around the plant’s base. If you find 2-inch tubers just below the surface, they’re ready. For new potatoes, harvest when they’re 1-inch in diameter.
The Flower Inspection
When flower buds appear and start opening, it’s a sign that tubers are growing rapidly. For early varieties, harvest when flowers bloom. For maincrop potatoes, wait until the flowers fade and foliage begins to yellow.
The Tuber Size Check
Gently brush away soil to expose a few tubers. If they’re golf-ball sized (1.5–2 inches), they’re perfect for immediate use. For storage potatoes, wait until they reach baseball size (3+ inches) and the skin is thick and rough.
The soil probe test is my go-to method because it gives you an instant read on what’s happening underground. I like to do this on a dry day when the soil is easier to work with.
Start by probing about 4–6 inches from the plant stem—this is where most tubers form. If you hit resistance and feel a small potato, that’s your cue to harvest soon.
For new potatoes, you can start checking as early as 50 days after planting. These little gems are tender and perfect for boiling or roasting. I’ve found that Yukon Golds and Red Pontiacs are especially responsive to this early harvest method. Just be gentle when digging—they bruise easily!
Don’t overlook the flower inspection—it’s one of nature’s best indicators. When your potato plants bloom, it means they’re putting energy into both flowers and tubers. For early varieties, like Kennebec or Russet, you can harvest right as the flowers open.
For later varieties, wait until the flowers fade and the foliage starts to yellow. This tells me it’s time to prep for harvest.
The tuber size check is where things get exciting. I love this step because you can actually see progress! When tubers reach 1.5–2 inches, they’re ready for the kitchen. For storage, aim for 3+ inches—these will keep for months if cured properly.
Pro tip: If you see green skin on your tubers, they’ve been exposed to sunlight and contain solanine, which is toxic. Harvest immediately and avoid eating the green parts.
Timing is everything, and these three tests will give you the confidence to harvest at the perfect moment. Whether you’re growing fingerlings or Russets, mastering these methods ensures you’ll always pull potatoes that are firm, flavorful, and free of blemishes.
Next time you’re in your garden, grab a fork and give these tests a try—your taste buds will thank you!
🌱
Signs of over-harvesting potatoes and how to avoid ruining your crop
Over-harvesting potatoes is a common mistake that can turn your hard-earned crop into shriveled, green, or sprouted tubers. When you dig too early, potatoes may be too small or soft, while waiting too long risks overripe potatoes that split or develop excessive sprouts.
The key is recognizing the perfect harvest window and handling them gently afterward.
One of the biggest red flags is green stem ends on your potatoes—this means they’ve been exposed to sunlight and contain solanine, a toxic compound. Another sign of over-harvesting is thin, papery skin, which indicates the potatoes were left in the ground too long and dried out.
If you notice these issues, don’t panic—proper storage can still save your crop.
Digging too early: Potatoes <2 inches in diameter, soft texture.
Digging too late: Tubers split, skin cracks, or sprout excessively.
Exposing tubers to light: Causes green skin (toxic solanine buildup).
Solution: Harvest when 70% of foliage yellows and soil is dry.
To avoid over-harvesting, start by monitoring your plants’ foliage. When about 70% of the leaves turn yellow and die back, it’s time to harvest.
For new potatoes (smaller varieties), you can dig earlier when tubers reach 1–2 inches in diameter, but wait until the foliage yellows for mature potatoes. Use a garden fork to gently loosen soil and avoid damaging the tubers.
Once harvested, cure your potatoes for 1–2 weeks in a dark, well-ventilated space at 50–60°F. This hardens their skin and prevents bruising. Store them in a cool, humid place (like a root cellar or paper bag) to extend freshness.
Avoid refrigeration—it turns starches into sugars, making potatoes sweet and mealy.
If you’ve already over-harvested, don’t throw them out! Small or slightly green potatoes can still be used for cooking (peel them thoroughly). For split or sprouted tubers, chop them into hash browns or potato salad to salvage the crop.
Proper timing and care now will ensure your next harvest is flawless and bountiful.
Remember, potatoes are underground survivors, but they still need your attention at harvest time. Pay close attention to the foliage, tuber size, and skin condition, and you’ll avoid the pitfalls of over-harvesting. Happy digging!